
PS/2 Mouse on a PIC with a 9x11 LED Display
PS/2 Mouse
A months ago I found some web pages describing the physical and signalling protocols between a PS/2 mouse and a PC. It was a lot simpler than I expected. Even though there are six pins on a PS/2 mouse, only two of them are part of the protocol: one for clock and one for data. "Data and clock? That's all?" I thought. So I decided to write an program for a PIC so it could communicate with a mouse.
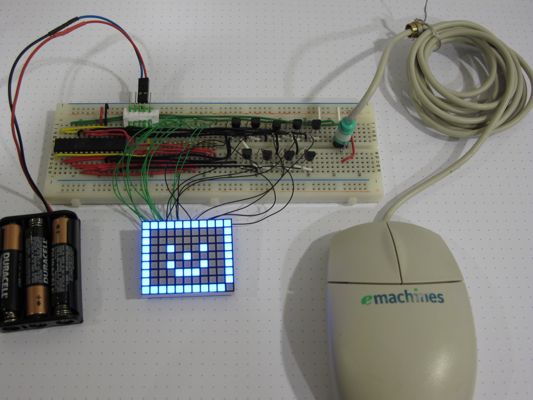
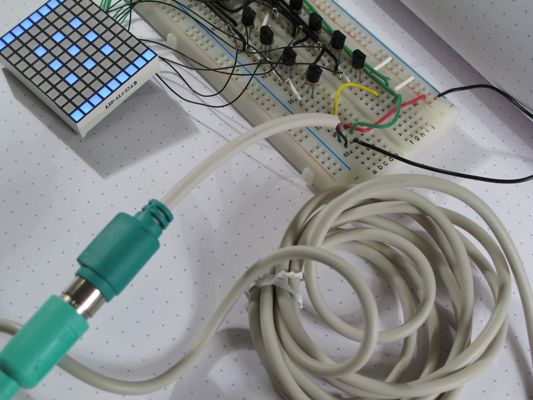
When I was done I had a set of PS/2 communications routines and a small program running on a PIC16F726 that worked with a PS/2 mouse plugged into a breadboard. I can move a "cursor" and toggle elements on the 9x11 LED display. I can clear the display using the right button and load a pattern by pressing the right and left buttons at the same time. Also, the application can detect when the mouse is unplugged.
Tonight I took it one step further and added a USB-to-PS/2 adapter, and then plugged in a Bluetooth-to-USB dongle with a Bluetooth mouse. This worked, much to my surprise, especially since the USB mouse I tried did not work.
Leave comments on the blog post
Downloads are available at the bottom of the page.
Larger photos available on Flickr
Getting Started
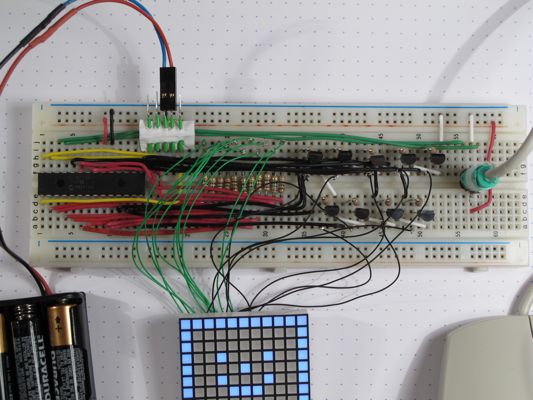
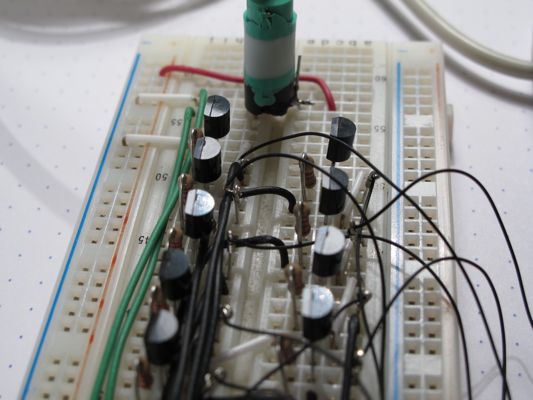
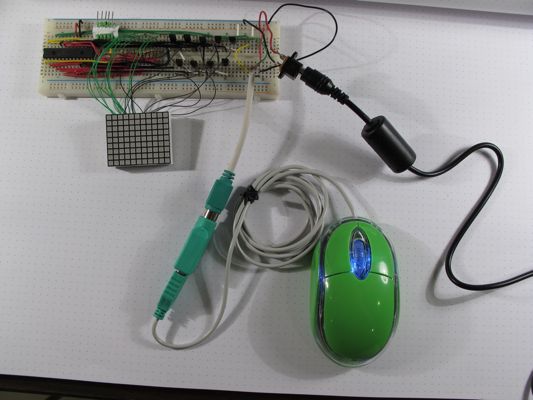
Late last year I ordered a bunch of LED displays from China. I had one of the 9x11 displays connected to a PIC16F726 on my lab bench. I decided to start with that board and application and to add the PS/2 code to it. With a display, I figured, I would be able to show both horizontal and vertical changes. In the picture below, the PIC is on the left, the display driver (resistors and transistors) take up most of the middle, and the mouse is plugged into the right.
PS/2 Wiring
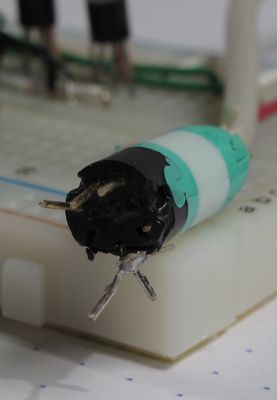
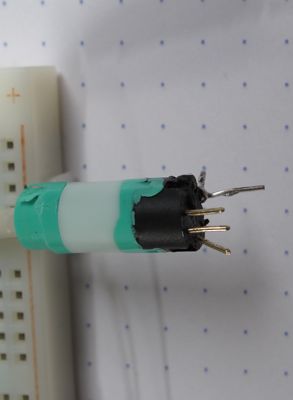
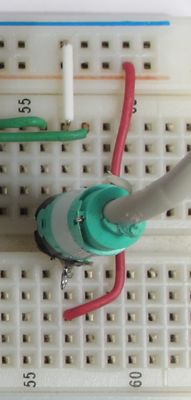
One of the first challenges was figuring out how to connect the mouse to the breadboard. I was thinking about pulling a PS/2 jack from an old motherboard, but I did not have one. I though about cutting the connector off of a mouse, but was not sure I would be able to sort out the wires without the plug. I decided to pull off the plastic cover around the plug and cut/bend away the metal case. It was not too difficult. I cut off the two pins that are not connected (N/C, according to the pin-out). This left three pins on one side and the fourth, the V+, on the other. Using the pliers I forced the three pins into a straight line. They were already close to the 0.1" spacing needed for the breadboard. For the V+ pin, I bent it to be horizontal, and then soldered a small wire (cut-off lead from an LED) so that there was 0.3" spacing from the other pins. With this, I could plug it into the breadboard.

Programming
After reading over the protocal pages a few times I started hacking together some code to toggle some pins. Eventually I was able to get some communication working. I don't remember all of the details, but, in the end, I had created some routines to manage the connection to the mouse. All of these are at the end of the source code file, in a section called "PS/2 Routines"
Thoughts
There were a few interesting aspects with this project.
Mouse Provides Clock
In the past I had worked with chips where the PIC provides both the clock signal. By contrast, a PS/2 mouse provides the clock signal, even when the PIC is providing the data. I was concerned about ending up in a loop waiting forever for the clock line to change. To prevent this, I added a counter so that the PIC code will timeout if the clock does not change in time. To make using this easier, I created two routines, PS2_WaitClockLow and PS2_WaitClockHigh. These routines will set an error bit if they time out.
Mouse Accepts Commands
I was surpised to find out that there the protocol is bi-directional. The host (PC normally, PIC in this case) must send a command to the mouse for it to start sending move mouse commands.
Missing Mouse Detection
Because the protocol is bi-directional, I was able to detect if the mouse is disconnected and when it is reconnected. If the app does not get any mouse moved commands after a period of a few seconds, it will jump to a "mouse test" routine. This routine will send a command to the mouse. The only way to request a clock. If this fails, then the app decides that the mouse is missing and goes into a loop waiting for the mouse to be plugged in.
Using a PS/2 Jack
I ordered an adapter from DealExtreme that had at one end a PS/2 Jack. Tonight I finally got around to cutting off the PS/2 jack and plugging that into the breadboard. This would let me test other mice, without having to cut apart their plugs. I had another of the mice that I cut apart, and that one worked when I plugged it into the PS/2 jack -- but I expected that. What I did not expect is that when I tried another PS/2 mouse, one from an old Sony VAIO workstation, that it would not work. The software can detect when a mouse is plugged-in. It detects this mouse, but does not get any mouse movements or key presses from the mouse.
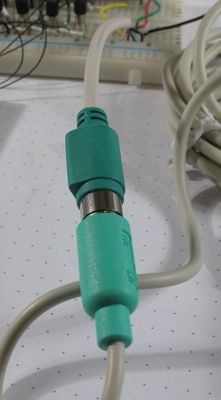
USB to PS/2 Attempt
Now that I had a PS/2 jack, I tried plugging in a USB-to-PS/2 adapter. After a bit of searching, I found one sentence on a Wikipedia page that explained how a USB mouse can work in an old PS/2 computer: if the mouse detects it is not in a USB port, it will revert to the PS/2 signalling protocol. Good enough for me. I plugged in a USB mouse. When I powered the board I could see that it detected the mouse, but it was not getting any mouse commands. I tried two other Dell mice, but they were not even detected.

Bluetooth to USB to PS/2 Works!
Just for fun, I tried a cheap Bluetooth mouse with a Bluetooth-to-USB adapter. I really doubted this would work, but, very much to my surprise, it did.

Blog posts
PS/2 Mouse on a PICOther posts
Vimeo video320volt.com
Colectivo RECLAB